AUTOMATIC OIL COOLER FAN KIT TWIN CAM
Installation instructions
Installing fans.
Position fan on the back side of cooler. There is a arrow on the fan showing
the direction of the air flow. You want the fan to pull air thru the cooler not blow the hot air of the motor on to the cooler.
Keep in mind the routing of wires. The black wire will go to a ground and the red to a hot. Insert a zip tie thru the fan
and cooler. Do the same with other three zip ties. Now do the same with the other fan. Make sure you are satisfied with the
placement of the fans, if not this is the time to adjust. Insert a washer and the plastic nut on the zip tie, and with your
fingers only, push on the zip tie. DO NOT USE ANY TOOLS TO TIGHTEN THE NUT. Cut off the excess.
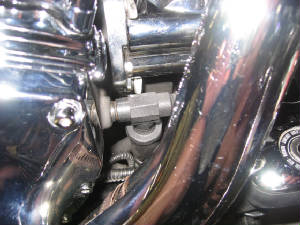
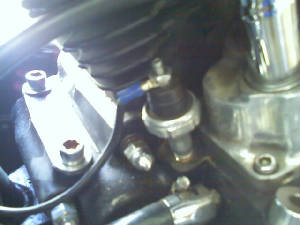
Installing the temp probe.
Locate the oil pressure switch, its located on the front of the block right
hand side.
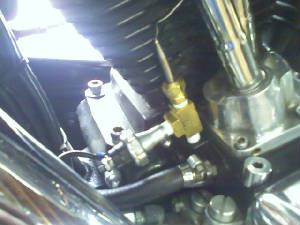
Remove the switch and install a nipple and a tee in its place. Use Teflon tape.
Now install pressure switch in the side outlet. Now decide where you want to install the adjustable switch and route the temp
probe and slide into the top of the tee. Tighten the compression fitting till tight. Do not over tighten. You can always go
back and tighten if it leaks.
Now install your adjustable switch in a location you want using the bracket
or zip ties or however you prefer.
Electrical connections.
The two black wires on the fan are twisted together and grounded out on the
oil cooler mounting bracket bolt. Find a hot wire that’s hot only when the key is on and tie into it using the blue
wire and quick connector . The other end will go into the top spade on the switch. On the fans twist the two red wires together
and tie in the red wire. Now routed it up to the switch and insert into the side spade. Start the motor and check for any
leaks. Tighten as needed.
Turn on the key and rotate the switch counter clockwise all the way and fans
should come on. Turn the switch clockwise till the fans stop. This is the manual operation of the fans. To set the automatic
operation, start the motor and monitor the temperature. You may have to wait to do this till the outside temp is pretty warm.
When the oil temp gets to the point you want the fans to turn on, rotate the switch slowly clockwise until the fans come on.
Now the fans will come on automatically anytime the oil temp gets this hot. Mark this point. So if the switch gets moved you
can always come back to this point.